|
|
|
|
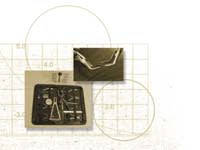
The Oblique Flush Cutter, top, excellent for cutting rimless screws. |
FRAME REPAIRS
Tooling Up the Dispensary
This "how-to" explains everything you need to buy to do basic repairs and fittings
By Alex Yoho, A.B.O.M.
Whether you're just starting a dispensary or simply re-examining your tool inventory, there are some basic "must-haves" that every optician or dispenser needs on hand. Sure, the tiny screwdrivers may be obvious, but there are other tools that are just as essential to any dispensary for general fitting and aligning as well as basic repairs.
Let's look at some of the essentials you'll need for adjusting frames. First consider the tasks at hand. First of all you'll want to be able to align the frame you will fit on others. Although much of what you will do to align a frame will be done with the best tool in your arsenal, your hands, you will also need the leverage that hand tools provide.
When you "square up" a frame to give yourself a starting place for customizing it to the patient, the frame's appearance needs to be maintained at all costs. Many adjusting tools today have pads on one or both jaws to protect the finish. As you purchase these tools, it is very wise to also purchase replacement jaws. This will keep you from finding yourself in a sticky situation when a jaw or pad finally wears out, and your best customer needs that $1,400 luxury frame restored after accidentally rolling over on it in bed.
|
|
|
|
The Screw Insertion Pliers,
top, are used for inserting spring hinge screws, and were invented by Alex
Yoho. The Student Kit, bottom, by Grobet has all the basics.
|
|
When considering which types of padded pliers to get, I would first recommend at least one (two would be better) bracing plier with a flat nylon jaw and a thin, flat metal jaw that closes to a parallel position when it is all but about 2 or 3mm from closing. This will allow a sturdy grip on an end piece with the nylon jaw on the front and the metal jaw flat on the eyewire barrels. If this plier didn't close parallel, there would be too much pressure on the barrel closest to the joint of the pliers, causing it to deform or possibly break. Examples of these pliers are: Grobet #46.737; Hilco #21/221; Sadler No. 144 Stock code: 05-1440; Western #2013 Flat Metal Jaw/Nylon Plier.
There is a similar plier to the one just mentioned that has great value in conjunction with the bracing plier. It consists of the same flat nylon pad, but has a thin rounded or conical metal jaw. This allows access to tight places such as rimless endpieces while you brace with another plier. Examples of these pliers are: Grobet #46.685; Hilco #21/232; Sadler Stock Code: 05-1200; Western #1012.
Adjusting Temples
The tools discussed above will hold a frame in place and adjust temples in or out, but if the temples bounce on one side as you lay the frame on its back, you'll need a method of adjusting pantoscopic (think bending temples down) or retroscopic (think bending temples up) tilt. In some cases, such as a standard
L-shaped endpiece on a metal frame, it's easy to use two bracing pliers, one to brace and the other to grip the top and bottom of the endpiece. Be sure to put the padded jaw on top to prevent scuffing the finish where it is most likely to be observed.
Another type of pliers used for pantoscopic and retroscopic bends is the angling plier. There are several configurations. Probably the most useful is the wide-jaw angling pliers. Examples of these are: Grobet #46.5265 and #46.699; Hilco #21/202; Sadler Stock Code: 05-1130; Western #2009. The advantage of a wide jaw is that it will reach around the temple to grip the hinge, making it possible to adjust the fold, as well. A word of caution regarding bending hinges: It is usually better to try to bend the endpiece rather than the hinge itself. This will yield a much more permanent adjustment and is more capable of enduring the pressures of bending than the smaller hinge barrels.
|
|
|
|
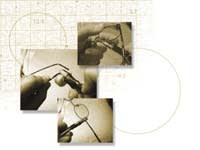
Top to bottom: The European Pad Adjusting Pliers are used for screw-on type pads. The Cold Bend Pliers make even the most difficult bends easier. The Bracing Pliers are considered the most important pliers to have. |
On plastic frames it is usually not possible to bend the endpiece area, so in that situation it's acceptable to bend the hinges. After bending a hinge on a plastic frame, however, it will often be necessary to file the butt of the temple so it will butt properly against the front. If you don't, the hinge will eventually bend back to its original position causing further adjustments in the future.
Files are essential tools, but we need different files for different uses. For the plastic temple butt referred to earlier, we would want a file that is rasp-like with a course cut. Examples of these files are: Grobet #31.383 and #31.114; Hilco #20/350 and 20/351; Sadler Stock Code: 12-1210 and 12-1200; Western #2078. Using an extremely course cut requires a steady hand, so to begin you may want to select a medium cut.
There are several different needs for metal files. For a general-purpose file I would recommend a six-inch flat #2 "bastard cut." A file with this type of cut will move metal effectively, yet leave a fairly smooth finish. Examples of these files are: Grobet #31.146; Hilco #20/352; Sadler Stock Code:12-1180; Western #2070. To complete a basic file collection you should have a file for smoothing burs of screws in tight situations. This requires extreme caution when filing near lenses or delicate frame finishes. Riffeler files sometimes known as spoon files are appropriate for this. Examples are: Grobet #31.947; Hilco #20/353; Sadler Stock Code: 12-1130; Western #2074.
Nose Pads and Others
For adjusting nose pads there are a number of specialized tools. There are two that I would not want to be without. The first is a flat/round snipe-nosed plier. This is used any time you need to bend a wire such as a pad arm. The round jaw always goes on the inside of the bend to prevent cutting into and weakening the wire. Examples are: Grobet #05-1020; Hilco #21/208; Sadler Stock Code: 12-1130; and Western #2014.
The second pad adjusting tool is for European-style pad arms. These are the type where the nose pad is screwed onto the arm. The pliers have a flat or slightly curved jaw to fit the face of the pad, and a cup-shaped jaw that caresses the screw box. Examples are: Grobet #46.738; Hilco #21/236; Sadler Stock Code:
05-1122; Western #2030. These pad pliers will generally work for all pad arm types, but there are similar pliers that are a bit more specialized such as those that specifically fit the push-on type pad arms: Grobet #46.057; Hilco #21/201; Sadler Stock Code: 05-1121.
|
|
|
|
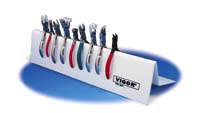
The Plastic Pliers Rack helps keep things neat. |
|
The same thing applies to cutting pliers. Having a big, inexpensive pair for cutting heavy things such as a temple core is essential to preserving your more delicate cutters. For heavy-duty cutters, consider the following: Grobet #46.215; Hilco #21/039; Sadler Stock Code: 05-1068; Western #2022. The finer cutters can be obtained in several forms, including a regular cut or a chapel cut. The chapel cut leaves a very smooth finish when it cuts off a screw, but it wears down and dulls quickly since it is thinner at the edge. The regular cut has cutting edges that are slightly angled. They pinch off more than cut through, so there is a ragged end, but they can last much longer. Here are some examples: Grobet #48.816; Hilco #21/303; Sadler Stock Code: 05-1066 or 05-1067 (chapel); and Western #2025.
|
|
|
|
The Lens Aligning Pliers,
top, an essential tool for mounting lenses. The Oblique Cutter,
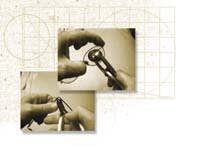
bottom, is well suited for getting into tight places. |
Lens turning pliers are pretty essential. You could pop the lens in and out a few hundred times until the bifocal lines or the axis looked just right, or, you could use a lens turning plier to fine tune them while they are still in the frame. Favorites are as follows: Grobet #46.767; Hilco #21/409; Sadler Stock Code: 05-2145; Western #1029.
Buying kits of tools is another way to approach the tooling up of your dispensary. A caveat to consider, however, is that you will more than likely be buying one or two things that you'll never use. That might not be so bad if you get the tools you do need plus the others, including some of the ones above, at a reduced price.
Selection Tips
Brand loyalty isn't as critical as in some facets of our industry. The four brands listed as examples are quite reputable. In fact, they often source tools from the same place and even from one another. All of these suppliers have several lines of varying degrees of quality and price. If you are strapped for cash, go ahead and try the economy lines. If they serve your purpose well, then stick with it. If you are a person who likes the finer things in life, you probably will appreciate the difference that a premium tool offers. Usually that difference is in the finish, but occasionally there is enough difference in the materials used to give it a superior quality.
As your tool collection grows, you will probably find yourself with an eclectic mix of brands and special uses. This will arise out of need as time goes on, and when you determine that need, you should be sure and have up-to-date catalogs from as many suppliers as possible that you can browse for just the right tool for the job. Be careful though, it's easy to become a tool junkie and find yourself with tools that are needed only once in a blue moon. It's easier to farm out those rare repair jobs to a lab or repair center.
Regardless, if a tool doesn't feel right in your hand, and doesn't literally become an extension of your hand, you should look for the ones that do. You might want to try some of the new pliers offered that are ergonomically designed such as the ErgoPro by Hilco, or the Guild line by Western. Take opportunities to visit the tool suppliers at trade shows or ask your lab salesman to show samples of the lines.
If your lab is agreeable, you might even ask to speak with the employees who work with these tools. Those of us who do form very strong, and often very well reasoned opinions.


