Fix and Fit
Fitting kids' frames
By Alex Yoho, ABOM
The first step in working with kids is having a good frame selection. As you'll see, a little planning can go a long way toward making your life easier when it comes to fitting your young patients.
Infants fly in the face of conventional fitting because their heads are large in proportion to their pupillary distance.
|
|
|
|
Frame from A Child's View has no back pads, but features a bridge stock that will meet the special needs of infant eyeglass wearers |
|
Frame selection. It's important to follow good fitting protocol by selecting a frame whose PD matches the patient's PD. As with an adult frame, you can exceed the patient's PD by 4mm to 6mm depending upon the Rx, but keep in mind the lens edge thickness that is created by decentration.
The bridge. The bridge is an area that is difficult to fit on infants. There are few frames that really fit an infant's bridge, but there are plastic frames that have a low bridge and no back pads, yet the bridge stock is sufficient (see photo). Metal frames are also possible if they have silicone unifit bridges that are especially made for no-bridge situations.
Fitting. In terms of fitting, you'll need to bend the temples out as needed. Next, curve the temples so they follow the curve of the head but don't touch it until after the widest point of the head.
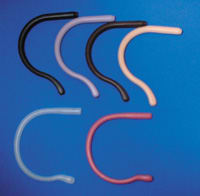
Temple tips. As for keeping the glasses on, a good choice is cable-maker type temple tips. Many of these, such as those featured on p. 30, are easy to apply.
To install, start by putting the eyewear on the child by holding on to the existing temple tips. Slide your fingers to the back of their ears and bend the temples where your fingers came to rest. Repeat the process, looking behind the ears to be sure that the temple first bends where it touches the top back of the ear. It is this top bend that you will match to the cable end's top bend. You can see where the opening of the cable end will be, so mark this point with your thumb or a marker.
Now 10mm from this mark (toward the tip of the temple), cut the temple completely through. The temple will be inserted into the cable end.
|
|
|
|
Inset: Breitfeld and Schliekert cable ends. Above, this Paddington Bear metal frame has a silicone unifit bridge which works well in no-bridge situations |
There is, however, some further preparation that needs to be done to the temple before inserting it into the cable end. First, file the end to a point then blunt it just slightly. If the temple is all metal, you may have a lot of filing to do if you had to cut off all or most of the narrow core at the end. Avoid scratching the part of the temple that will show.
Filing. It's important to remember that a file is meant to cut only on the forward stroke. A file will become dull faster by raking it back and forth. And, only file the first 10mm. It is ok to leave the filed area square because it will help the tip fit.
When it comes to older children, the move from function to fashion creates a new set of challenges.
Frame selection. Dispensers once shied away from metal and rimless frames, but today's frames and choices of lens materials make both appropriate. The main problem is usually the bridge, which may not be developed.
Bridges. There aren't a lot of form-fit bridges that will fit a teen or pre-teen, so we often turn to adjustable pads. The trick is to add a lot of splay angle and pull the pads out to account for the lack of vertex distance created by having a less-than-developed bridge area.
Lenses. It is your duty to warn and recommend polycarbonate or Trivex lenses.
Teens going for the retro look with small plastic frames can present other challenges.
Bridge. The most important is to watch the bridge closely. You might have to flare the back pads. This can be done by heaping up the glass beads or salt and dipping in only the bridge area, or, by using hot air (preferably concentrated) to heat the back pads. It's important to avoid rolling the eyewire and to focus instead on just rolling the pads.
Nasal cuts may be used for broad noses, while some teens with developed bridges may need nasal fills. You can use the heating methods mentioned previously to alter the bridge area to fit the nose, but it will take some practice because smaller frames are limited in the amount of nasal fill and cut that can be applied without distorting the shape. Once the bridge is altered, it can be traced and the lenses edged to stabilize your work.
Adjustable pads. Don't forget that almost any plastic frame can have adjustable pads added. This is easily done in-office or at the lab. A product like "Hot Fingers" by Hilco is just the ticket for melting pad arms into frames.
It will also help later on with any hinge repairs. Removing the temple from the hinge and melting the hinge back into place, you can repair a frame.
Customizing eyewear for kids can be a rewarding niche. And remember: The market will provide the frames we want, if we support them.


